- No products in the cart.


What is Blender? What is Blender?
21
Feb
Blender is a free and open-source 3D creation software used for creating a wide range of visual media, including 3D models, animation, video games, and visual effects for movies and TV shows. It was created by Ton Roosendaal in 1998 and is currently maintained by the Blender Foundation.
Blender features a powerful and versatile interface that allows users to sculpt, model, animate, simulate, and render 3D scenes and objects. It supports a wide range of file formats, including FBX, OBJ, and 3DS, and features a built-in game engine and video editor. Additionally, Blender has an active community of users who share tips, tutorials, and assets that can be used in projects.
Blender is used by professionals in the entertainment industry, as well as by independent creators and hobbyists. Because it is open-source, it is freely available to anyone, and its community-driven development means that users can contribute to its development and help shape its future.
How do I use Blender?
Blender is a powerful 3D creation software that can be used for a wide range of projects, including modeling, animation, and visual effects. Here are some basic steps to get started with using Blender:
- Download and Install Blender: You can download Blender for free from the official website, https://www.blender.org/. After downloading, follow the installation instructions for your operating system.
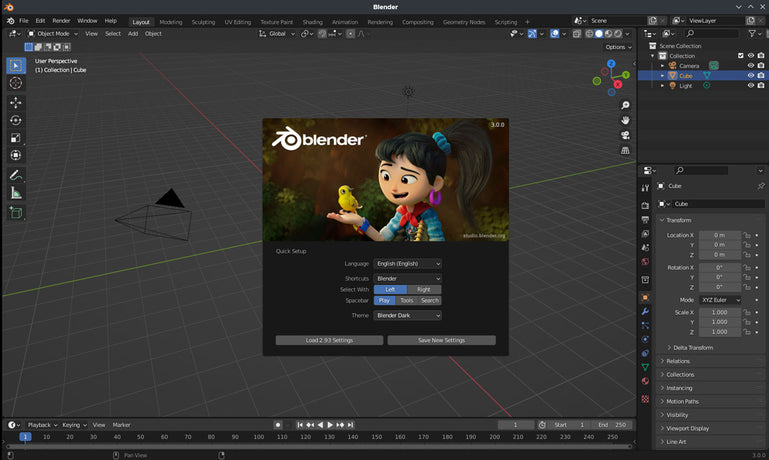
- Familiarize Yourself with the Interface: Blender's interface may seem overwhelming at first, but it is designed to provide access to all the tools and features you need to create 3D models and animations. Spend some time exploring the interface and getting familiar with the different panels and menus.
- Create a Scene: To create a new scene in Blender, select "File" > "New" from the menu. You can then choose the type of project you want to create, such as a 3D model or an animation.
- Add Objects to the Scene: To add objects to the scene, select "Add" from the menu or press "Shift + A". You can choose from a variety of object types, such as cubes, spheres, and cylinders.
- Edit Objects: To edit an object, select it in the 3D view and then use the tools in the properties panel to make changes to its shape, size, and other properties.
- Add Materials and Textures: To add materials and textures to an object, select it in the 3D view and then use the materials panel to apply colors, textures, and other visual effects.
- Animate Objects: To create animations in Blender, you can use keyframes to define the position, rotation, and other properties of an object over time. You can then use the timeline to preview and adjust the animation.
- Render the Scene: Once you have created a scene, you can render it to create a final image or animation. Blender's rendering engine can create high-quality images and animations that can be used in a wide range of projects.
These are just some basic steps to get started with using Blender. There are many more tools and features available in Blender, so be sure to explore the software and experiment with different techniques to create your own unique projects.
Is Blender free?
Yes, Blender is a completely free and open-source software. This means that anyone can download, use, and modify Blender without paying any fees or royalties. The Blender Foundation, the organization that maintains Blender, relies on donations and support from the Blender community to continue developing and improving the software.
Despite being free, Blender is a very powerful and feature-rich 3D creation software that is used by professionals in the entertainment industry, as well as by independent creators and hobbyists. It is available for download on the official Blender website, and is compatible with Windows, Mac, and Linux operating systems.
How do I animate in Blender?
To animate in Blender, you can use the software's built-in animation tools to create keyframes that define the motion of objects over time. Here are the basic steps to create an animation in Blender:
- Set up your scene: Before you can start animating, you need to set up your scene by adding objects, lights, and cameras. You can do this by using the Add menu or by importing 3D models from other sources.
- Switch to Animation mode: Blender has several different modes for different types of tasks, such as modeling and sculpting. To start animating, switch to Animation mode by selecting it from the dropdown menu in the top left corner of the Blender window.
- Set the keyframes: To create an animation, you need to set keyframes that define the position, rotation, and other properties of objects at different points in time. To set a keyframe, select an object in the 3D view, go to the frame where you want the keyframe to be set, and press the "I" key on your keyboard. You can then choose which properties you want to set as keyframes, such as location, rotation, or scale.
- Adjust the animation curves: Once you've set your keyframes, you can adjust the animation curves to change the timing and motion of your objects. You can do this by opening the Graph Editor and selecting the animation curves for the object you want to adjust. You can then use the handles on the curves to adjust the timing and interpolation of the keyframes.
- Preview and render the animation: Once you've finished animating, you can preview the animation by playing it back in the 3D view. You can also render the animation to create a final output that can be saved as a video file or used in other projects.
These are just the basic steps for creating an animation in Blender. There are many more advanced techniques and tools available in Blender for creating complex animations, so be sure to experiment and explore the software to create your own unique projects.
How do I sculpt in Blender?
Sculpting in Blender is a great way to create organic 3D models such as characters, creatures, or landscapes. Here are the basic steps to start sculpting in Blender:
- Create a base mesh: Before you can start sculpting, you need to create a base mesh that you will sculpt on top of. You can do this by adding a basic shape such as a cube, sphere, or cylinder, or by importing a 3D model from another software.
- Switch to Sculpting mode: Once you have your base mesh, switch to Sculpting mode by selecting it from the mode selector in the top bar of the Blender window.
- Choose your sculpting tool: Blender has a variety of sculpting tools that you can use to manipulate the geometry of your mesh. Some of the most commonly used tools include the Grab brush, the Smooth brush, and the Inflate brush. You can access these tools by selecting them from the brush menu in the toolbar on the left-hand side of the Blender window.
- Sculpt your mesh: With your sculpting tool selected, you can start manipulating the vertices of your mesh to create the shape you want. You can adjust the size and strength of your brush using the settings in the toolbar, and you can also switch between different brushes as needed.
- Refine your sculpt: As you work, you can use the smoothing brush to refine the surface of your mesh, and the crease brush to define sharp edges and ridges. You can also add more detail to your sculpt using the dynamic topology feature, which adds additional geometry to your mesh as you sculpt.
- Texture and paint your sculpt: Once you have finished sculpting, you can add textures and colors to your model using the texture painting tools in Blender. This can help bring your sculpt to life and add additional visual interest.
These are just the basic steps for sculpting in Blender. There are many more advanced techniques and tools available in Blender for creating complex sculptures, so be sure to experiment and explore the software to create your own unique projects.
How do I update Blender?
To update Blender to the latest version, follow these steps:
- Download the latest version: Go to the official Blender website at blender.org and download the latest version of the software for your operating system. The website should automatically detect your operating system, but you can also select it manually from the dropdown menu.
- Install the new version: Once you have downloaded the new version, open the installer and follow the prompts to install the software. The installation process should be straightforward and should not require any special configuration.
- Migrate settings: If you have customized settings, add-ons, or preferences in your current Blender installation that you want to migrate to the new version, you can copy the relevant files from your old installation to your new one. To do this, go to your old Blender installation folder and copy the "config" and "scripts" folders. Then paste these folders into the corresponding location in your new Blender installation folder.
- Check for updates to add-ons: If you have any add-ons installed in your old version of Blender, you may need to update them to work with the new version. You can do this by going to the User Preferences window, selecting the Add-ons tab, and clicking the "Check for Updates" button.
- Uninstall the old version: Once you have verified that the new version is working properly and that all your custom settings have been migrated, you can uninstall the old version of Blender. You can do this from the Control Panel (on Windows) or by dragging the Blender application to the Trash (on Mac).
These are the basic steps for updating Blender to the latest version. It's important to keep your software up to date to ensure that you have access to the latest features and bug fixes.
Where can I learn more about Animation, Visual Effects, and Video Games in Blender?
VANAS School is committed to training aspiring artists in the latest industry-standard software for animation, visual effects, and video game development. The school's curriculum is designed to provide students with the technical and artistic skills they need to succeed in their chosen field.
While VANAS School uses a range of industry-standard software, including Maya, 3ds Max, and Unreal Engine, some students choose to use Blender instead. Blender is a free, open-source 3D software that has become increasingly popular in the animation, VFX, and gaming industries due to its versatility and advanced features.
VANAS recognizes the growing importance of Blender in the industry and offers students the opportunity to learn and use the software in their coursework. Students who choose to use Blender are provided with the same high-quality instruction and support as those using other industry-standard software. They learn how to use Blender to create and animate 3D models, design environments, and create special effects, as well as how to integrate it with other software tools commonly used in the industry.
The school's instructors are experienced professionals who are familiar with both Blender and other industry-standard software, and can provide guidance and support to students regardless of the software they choose to use. VANAS also offers a range of resources, including access to online communities and tutorials, to help students learn and master Blender.
Whether students choose to use Blender or other industry-standard software, VANAS provides a comprehensive education that prepares them for a successful career in animation, VFX, and video game development. By combining technical skills with artistic creativity, VANAS School of Animation graduates are equipped to produce high-quality work that meets the needs of the industry.
Blender is a free and open-source 3D creation software used for creating a wide range of visual media, including 3D models, animation, video games, and visual effects for movies and TV shows. It was created by Ton Roosendaal in 1998 and is currently maintained by the Blender Foundation.
Blender features a powerful and versatile interface that allows users to sculpt, model, animate, simulate, and render 3D scenes and objects. It supports a wide range of file formats, including FBX, OBJ, and 3DS, and features a built-in game engine and video editor. Additionally, Blender has an active community of users who share tips, tutorials, and assets that can be used in projects.
Blender is used by professionals in the entertainment industry, as well as by independent creators and hobbyists. Because it is open-source, it is freely available to anyone, and its community-driven development means that users can contribute to its development and help shape its future.
How do I use Blender?
Blender is a powerful 3D creation software that can be used for a wide range of projects, including modeling, animation, and visual effects. Here are some basic steps to get started with using Blender:
- Download and Install Blender: You can download Blender for free from the official website, https://www.blender.org/. After downloading, follow the installation instructions for your operating system.
- Familiarize Yourself with the Interface: Blender's interface may seem overwhelming at first, but it is designed to provide access to all the tools and features you need to create 3D models and animations. Spend some time exploring the interface and getting familiar with the different panels and menus.
- Create a Scene: To create a new scene in Blender, select "File" > "New" from the menu. You can then choose the type of project you want to create, such as a 3D model or an animation.
- Add Objects to the Scene: To add objects to the scene, select "Add" from the menu or press "Shift + A". You can choose from a variety of object types, such as cubes, spheres, and cylinders.
- Edit Objects: To edit an object, select it in the 3D view and then use the tools in the properties panel to make changes to its shape, size, and other properties.
- Add Materials and Textures: To add materials and textures to an object, select it in the 3D view and then use the materials panel to apply colors, textures, and other visual effects.
- Animate Objects: To create animations in Blender, you can use keyframes to define the position, rotation, and other properties of an object over time. You can then use the timeline to preview and adjust the animation.
- Render the Scene: Once you have created a scene, you can render it to create a final image or animation. Blender's rendering engine can create high-quality images and animations that can be used in a wide range of projects.
These are just some basic steps to get started with using Blender. There are many more tools and features available in Blender, so be sure to explore the software and experiment with different techniques to create your own unique projects.
Is Blender free?
Yes, Blender is a completely free and open-source software. This means that anyone can download, use, and modify Blender without paying any fees or royalties. The Blender Foundation, the organization that maintains Blender, relies on donations and support from the Blender community to continue developing and improving the software.
Despite being free, Blender is a very powerful and feature-rich 3D creation software that is used by professionals in the entertainment industry, as well as by independent creators and hobbyists. It is available for download on the official Blender website, and is compatible with Windows, Mac, and Linux operating systems.
How do I animate in Blender?
To animate in Blender, you can use the software's built-in animation tools to create keyframes that define the motion of objects over time. Here are the basic steps to create an animation in Blender:
- Set up your scene: Before you can start animating, you need to set up your scene by adding objects, lights, and cameras. You can do this by using the Add menu or by importing 3D models from other sources.
- Switch to Animation mode: Blender has several different modes for different types of tasks, such as modeling and sculpting. To start animating, switch to Animation mode by selecting it from the dropdown menu in the top left corner of the Blender window.
- Set the keyframes: To create an animation, you need to set keyframes that define the position, rotation, and other properties of objects at different points in time. To set a keyframe, select an object in the 3D view, go to the frame where you want the keyframe to be set, and press the "I" key on your keyboard. You can then choose which properties you want to set as keyframes, such as location, rotation, or scale.
- Adjust the animation curves: Once you've set your keyframes, you can adjust the animation curves to change the timing and motion of your objects. You can do this by opening the Graph Editor and selecting the animation curves for the object you want to adjust. You can then use the handles on the curves to adjust the timing and interpolation of the keyframes.
- Preview and render the animation: Once you've finished animating, you can preview the animation by playing it back in the 3D view. You can also render the animation to create a final output that can be saved as a video file or used in other projects.
These are just the basic steps for creating an animation in Blender. There are many more advanced techniques and tools available in Blender for creating complex animations, so be sure to experiment and explore the software to create your own unique projects.
How do I sculpt in Blender?
Sculpting in Blender is a great way to create organic 3D models such as characters, creatures, or landscapes. Here are the basic steps to start sculpting in Blender:
- Create a base mesh: Before you can start sculpting, you need to create a base mesh that you will sculpt on top of. You can do this by adding a basic shape such as a cube, sphere, or cylinder, or by importing a 3D model from another software.
- Switch to Sculpting mode: Once you have your base mesh, switch to Sculpting mode by selecting it from the mode selector in the top bar of the Blender window.
- Choose your sculpting tool: Blender has a variety of sculpting tools that you can use to manipulate the geometry of your mesh. Some of the most commonly used tools include the Grab brush, the Smooth brush, and the Inflate brush. You can access these tools by selecting them from the brush menu in the toolbar on the left-hand side of the Blender window.
- Sculpt your mesh: With your sculpting tool selected, you can start manipulating the vertices of your mesh to create the shape you want. You can adjust the size and strength of your brush using the settings in the toolbar, and you can also switch between different brushes as needed.
- Refine your sculpt: As you work, you can use the smoothing brush to refine the surface of your mesh, and the crease brush to define sharp edges and ridges. You can also add more detail to your sculpt using the dynamic topology feature, which adds additional geometry to your mesh as you sculpt.
- Texture and paint your sculpt: Once you have finished sculpting, you can add textures and colors to your model using the texture painting tools in Blender. This can help bring your sculpt to life and add additional visual interest.
These are just the basic steps for sculpting in Blender. There are many more advanced techniques and tools available in Blender for creating complex sculptures, so be sure to experiment and explore the software to create your own unique projects.
How do I update Blender?
To update Blender to the latest version, follow these steps:
- Download the latest version: Go to the official Blender website at blender.org and download the latest version of the software for your operating system. The website should automatically detect your operating system, but you can also select it manually from the dropdown menu.
- Install the new version: Once you have downloaded the new version, open the installer and follow the prompts to install the software. The installation process should be straightforward and should not require any special configuration.
- Migrate settings: If you have customized settings, add-ons, or preferences in your current Blender installation that you want to migrate to the new version, you can copy the relevant files from your old installation to your new one. To do this, go to your old Blender installation folder and copy the "config" and "scripts" folders. Then paste these folders into the corresponding location in your new Blender installation folder.
- Check for updates to add-ons: If you have any add-ons installed in your old version of Blender, you may need to update them to work with the new version. You can do this by going to the User Preferences window, selecting the Add-ons tab, and clicking the "Check for Updates" button.
- Uninstall the old version: Once you have verified that the new version is working properly and that all your custom settings have been migrated, you can uninstall the old version of Blender. You can do this from the Control Panel (on Windows) or by dragging the Blender application to the Trash (on Mac).
These are the basic steps for updating Blender to the latest version. It's important to keep your software up to date to ensure that you have access to the latest features and bug fixes.
Where can I learn more about Animation, Visual Effects, and Video Games in Blender?
VANAS School is committed to training aspiring artists in the latest industry-standard software for animation, visual effects, and video game development. The school's curriculum is designed to provide students with the technical and artistic skills they need to succeed in their chosen field.
While VANAS School uses a range of industry-standard software, including Maya, 3ds Max, and Unreal Engine, some students choose to use Blender instead. Blender is a free, open-source 3D software that has become increasingly popular in the animation, VFX, and gaming industries due to its versatility and advanced features.
VANAS recognizes the growing importance of Blender in the industry and offers students the opportunity to learn and use the software in their coursework. Students who choose to use Blender are provided with the same high-quality instruction and support as those using other industry-standard software. They learn how to use Blender to create and animate 3D models, design environments, and create special effects, as well as how to integrate it with other software tools commonly used in the industry.
The school's instructors are experienced professionals who are familiar with both Blender and other industry-standard software, and can provide guidance and support to students regardless of the software they choose to use. VANAS also offers a range of resources, including access to online communities and tutorials, to help students learn and master Blender.
Whether students choose to use Blender or other industry-standard software, VANAS provides a comprehensive education that prepares them for a successful career in animation, VFX, and video game development. By combining technical skills with artistic creativity, VANAS School of Animation graduates are equipped to produce high-quality work that meets the needs of the industry.